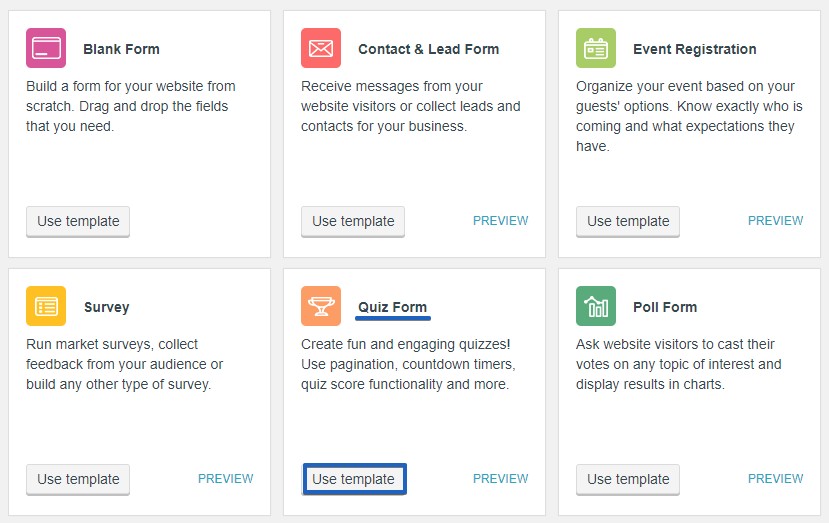
This online quiz tutorial will explain to you how simple it is to create a WordPress quiz that you can use in your WordPress educational website, for example. With checkboxes fields you can provide more than one correct answer in a question, whereas radio buttons and dropdown lists establish only one correct answer each. Using the Name field you can list the name of every student that completed the test. Creating a quiz with CaptainForm is easy. Start by going to the plugin in your WordPress dashboard and then click on New Form and then choose the Quiz Form template.
The following steps will help you build an online quiz that features a countdown timer of 15 minutes and a results page displaying all missed answers. Plus, the quiz will not accept partial answers (although with CaptainForm it is possible to create quizzes with partial answers, with or without deduction).
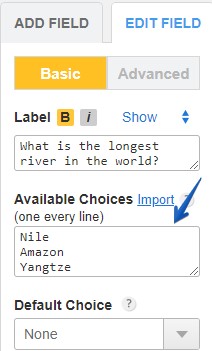
Step 1: In the Form Editor, add the field’s Name and the number of fields that you want. If you choose a radio-button, type each question in the Label and add the possible answers that visitors will choose from in Available Choices.
Step 2: In Advanced options → Correct Choice, select the choices that are correct.
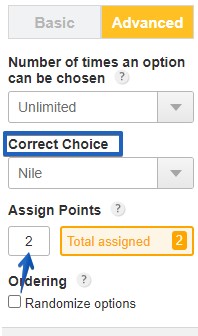
In this example, each question will value 2 points. Under Correct choice you’ll find the Assign points box. Add 2 and you’ll see the amount from Total assigned changing. Keep adding questions and assign the number of points to them until you reach the value that you want in Total assigned.
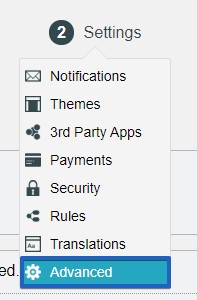
Note: Points can only be assigned to choice fields, which include radio buttons, checkboxes, dropdowns or likert scales. Step 3: Go to Settings → Advanced
And tick the option Show countdown timer under the quiz section.
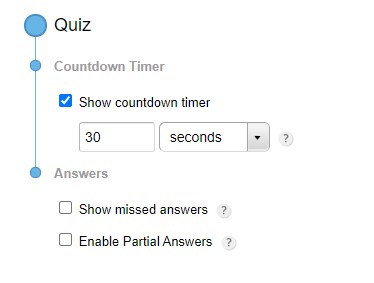
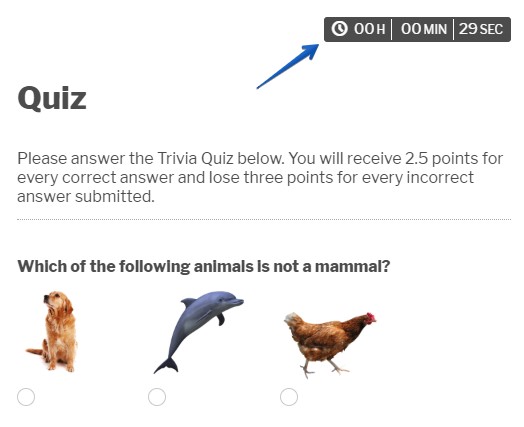
Here you will add the time that you will give to your users to complete the quiz. In this example, we added 15 in the box and selected minutes from the dropdown list, meaning that the countdown will last 15 minutes and after the time is finished, the quiz will be submitted automatically.
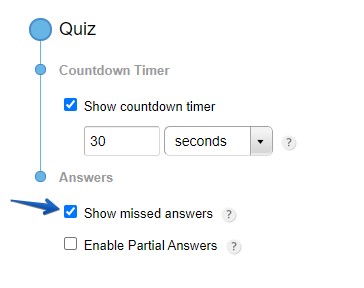
Step 4: In the same section, choose Show missed answers in order for students to see which questions they failed after completing the test.
Step 5: Finally, go to Settings → Notifications
And then go to the Form Owner Options section and tick the option Show quiz results – that is below Thank You Page and Redirects.
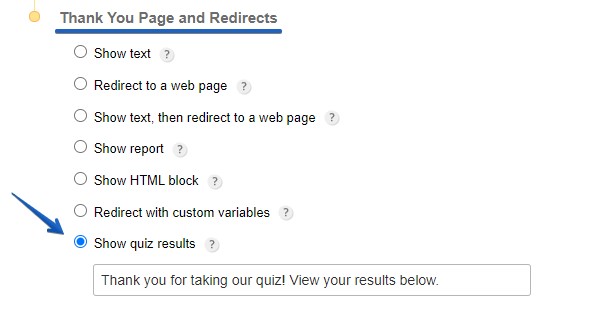
This will redirect your students to their quiz results right after submission. You can also add a personalized message, as the “Thank you for taking the History quiz! View your results below.” shown in the example above. Important: Do not forget that you need to save these changes in the Notifications section, otherwise the changes will not automatically happen.

That’s it! Just go to our Publish section and choose from the 4 ways of publishing, and you can start testing your student’s knowledge.