If you’re planning to register users on WordPress, you’ll need a nicely designed registration form. Luckily for you, CaptainForm is a powerful WordPress forms plugin that you may use to create the registration form that you need, and use it to sign up new users. How is it done? Quite simple, actually. Assuming that you have already installed the plugin in your WordPress dashboard and activated it, we’ll start the tutorial with the form editor. Here we will create the registration form as seen in the image below.
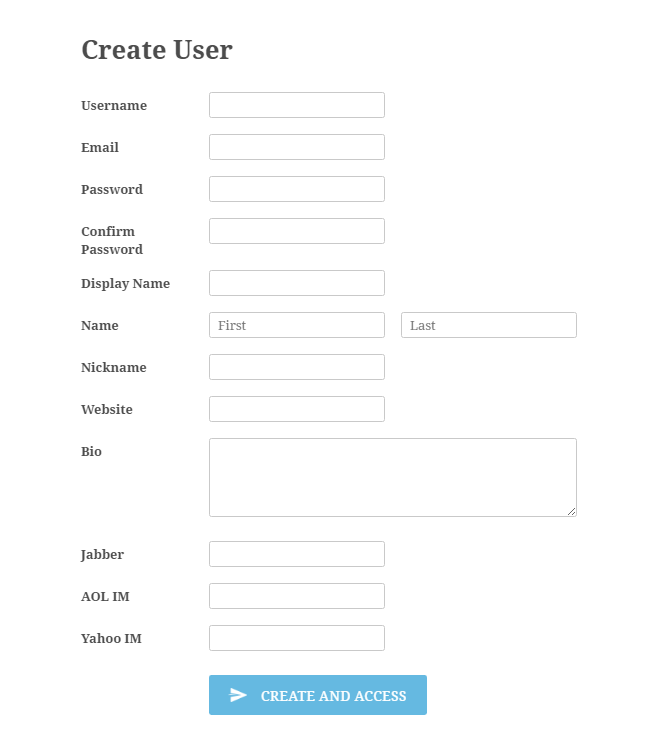
Notice that the following fields are required: Username Email Password Confirm Password Display Name We’ll be needing the inputs of those fields to create new users. Before going further, match the password fields as shown in the image:

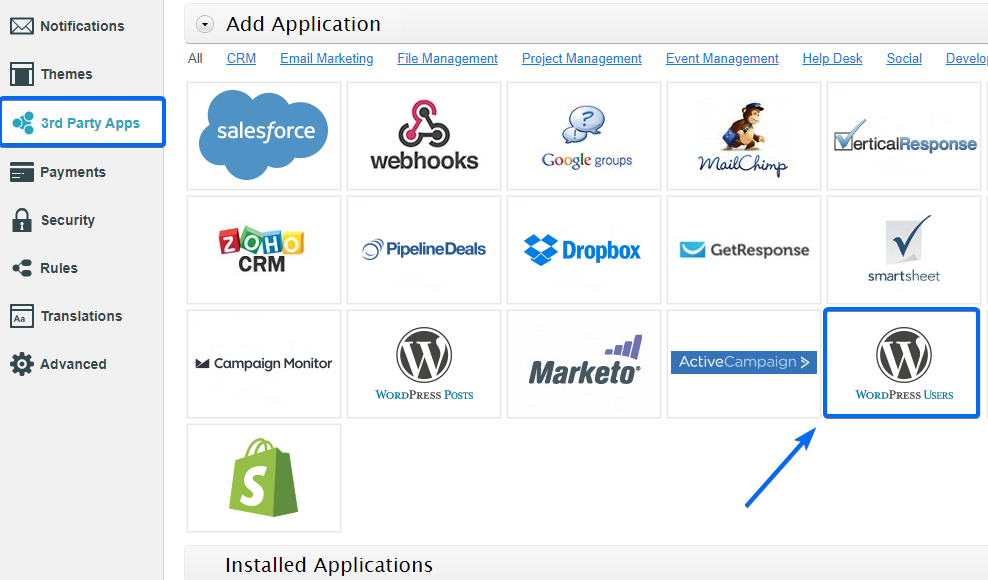
Select the field and use the match option from the advanced tab of the field editor panel. Now, after you’ve created your user registration form, as in the example above, follow these steps: 1. Go to Settings and click on 3rd Party Apps.
2. Now select WordPress Users within the list. Hover over the image and press Add.
Note:The WordPress Users app is created to pass the information from the registration form to your website’s admin panel. What the application does is that it connects to your website and sends the inputs of the form fields to their designated partners in the user profile section. The reason why fields, such as username, email, password and display name are important, and are mandatory to be filled out.
3. If you want to create users on another domain or subdomain, type in the domain/subdomain in the textbox. It’s highly important that the website where you want to create users, has the CaptainForm plugin installed and is associated with the same email address (for security reasons). By default, the domain/subdomain where the form is created, appears in the app.

4. Once the domain/subdomain is added, hit Connect to WordPress.
5. A customization lightbox will pop up on screen. Remember the fields of the user registration form? They have to be associated here. Start by associating the required fields. Those are marked with the red asterisk.
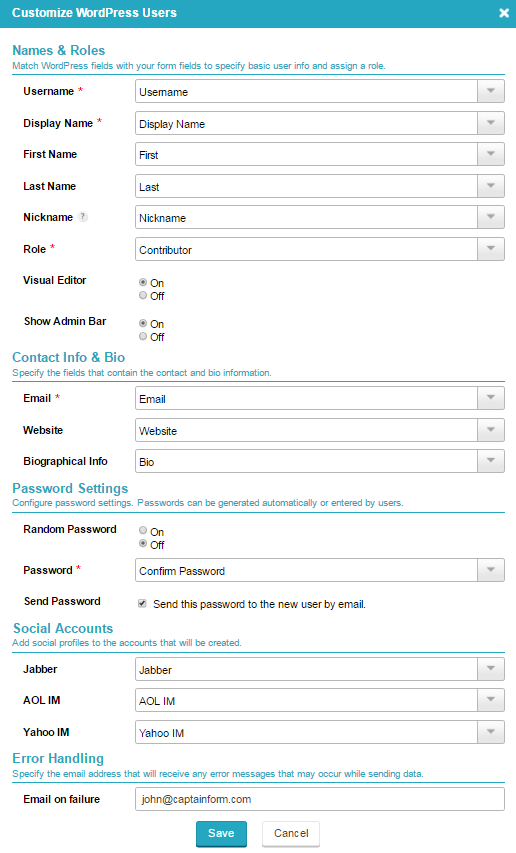
6. Role. You can create with this integration administrators, editors, authors, contributors or subscribers. Use the drop down to make your choice.
7. Next, toggle the visual editor on or off, as well as the admin bar that is located on top of the WordPress dashboard.

8. Afterwards, map the contact details and move to the password settings.
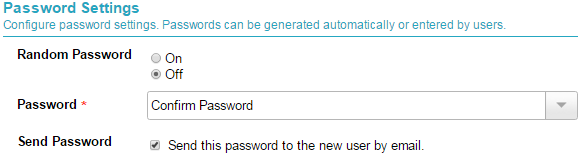
9. In this tutorial, we request the password from the user, while you can also choose to automatically generate one of the user that he/she will receive by email.
10. Finally, match the fields for social accounts and change the error handling email, if needed. In case of an error, you’ll be notified by email.
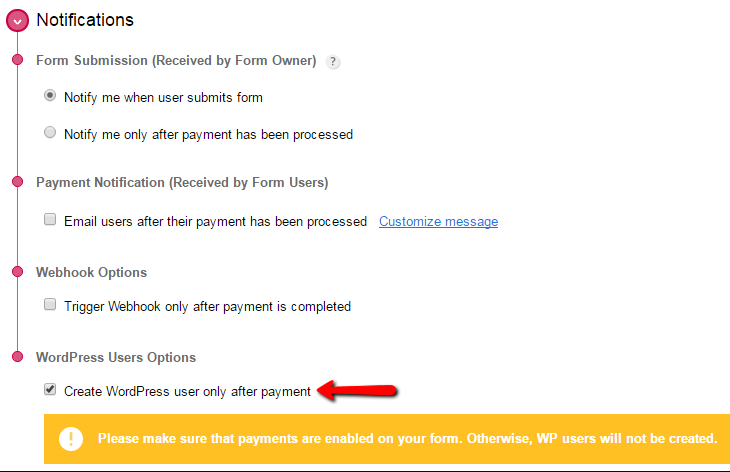
11. Click Save and presto! Incoming new users. But the fun doesn’t stop here. If you want to charge users for registering, there’s a little option you can select in the Payments section. It’s named Create WordPress users only after payment. This means that after the user submitted the form and pays, the account will be created immediately.