In order to prefill form fields, you need to create a customized URL for your web form. The prefill link to your web form looks like this:
- where the first part[captainform id=”1234567″ is the short code of your form. Copy paste your own short code in a text editor. The shortcode is located in Publish – Short Code.
- cf_custom_var stays unchanged and it is followed by the form field ID.
To retrieve the form field IDs, enter the view mode of your form and use the inspect element tool of your browser.
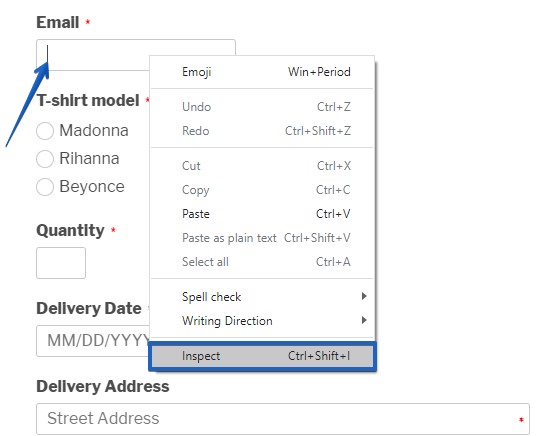
The ID of the field input is shown in the format id123-controlxxxxxx where the last digits represent the unique identifier of the field. 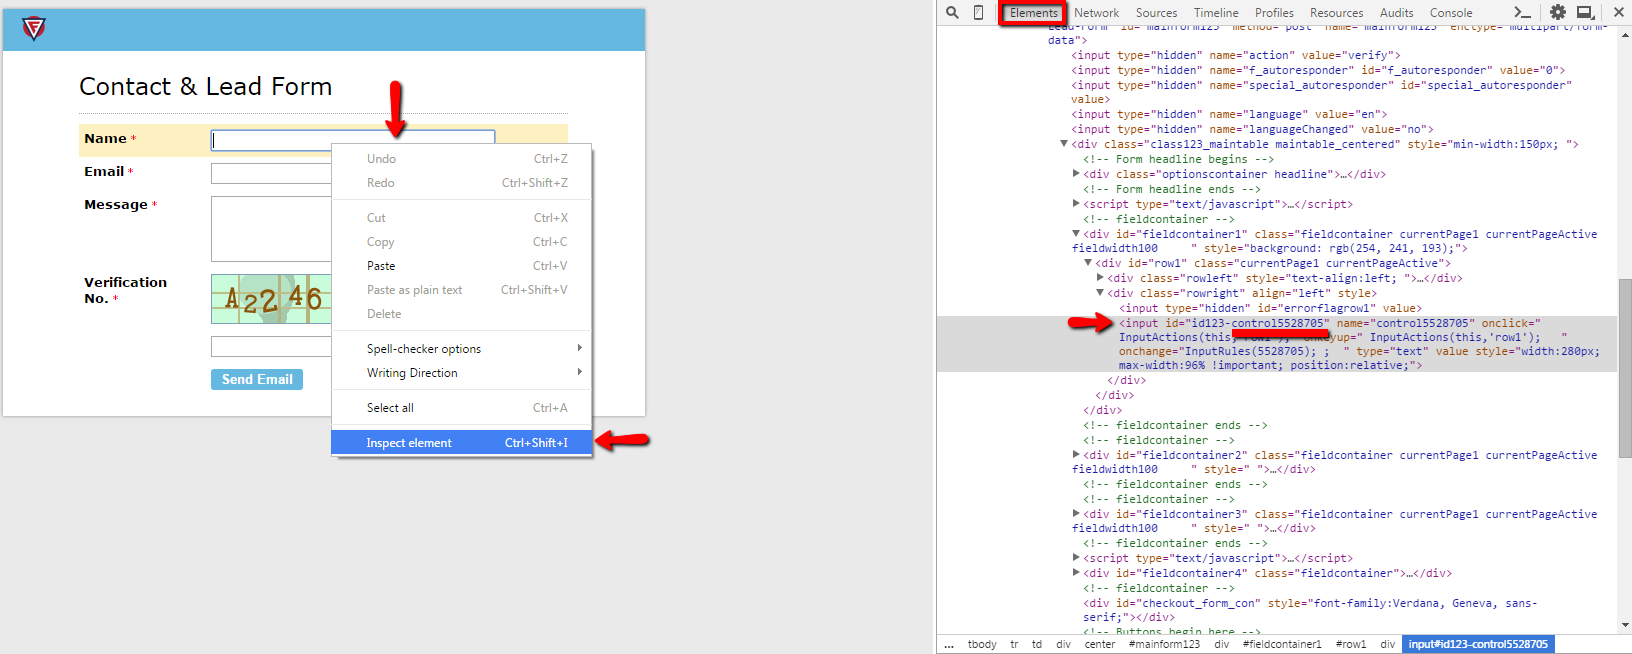
Now, copy this following code and paste it after cf_custom_var
So far you should have the following structure with the short code and the field ID.
[captainform id=”1234567″ cf_custom_var1111111]
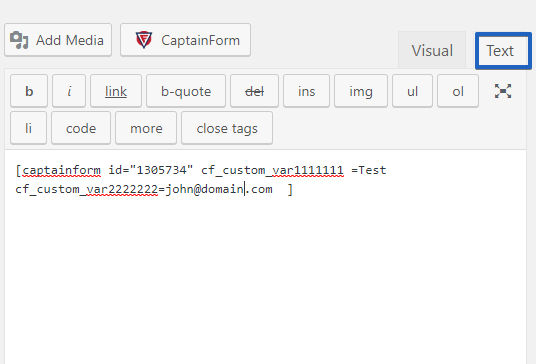
Next, add the following =presetvalue. In this example we used an email field and set the value john@domain.com
[captainform id=”1234567″ cf_custom_var1111111=john@domain.com ]
You can prefill as many fields as you want within a form.
After you finish adding all the fields and values, go to your page or post and paste the full code in the text editor. Update the WP post/page and click to preview the changes. The form will be prefilled with preset values.
- Preset values for the fields Text Box, Text Area, Number, Email, Website: You only need to include cf_custom_var1111111=presetvalue in the custom short code . Replace presetvalue with the value of your choice and 1111111 with your control form field ID.
- Preset values for the fields Name, Hour, Price: In this case, the form field is split into several subfields. For example, the field Name contains a First Name and a Last Name. These two have separate IDs: First Name – 1234567-1, Last Name – 1234567-2. Therefore, the right syntax will be cf_custom_var1234567-1=John and cf_custom_var1234567–2=Doe. This goes for the Phone field, as well. If you’ve got more than two subfields, then go on using -3, -4, -5 etc.
- Preset values for Phone: If you want to prefill the input of the Phone field, use this code: cf_custom_var1234567=123-342-345. However, make sure you use the format you’ve selected for the field.
- Preset values for the Address field: An address field functions in the same way as the Name field, only that here you’ve got five subfields and, consequently, five IDs, form 1234567-1 to 1234567-5. In addition, there is the Country field, which is a dropdown list. To preset a value for the list of countries, you need the following code: cf_custom_var1234567-6=CountryName.
- Preset values for Dropdown Lists and Radio Buttons: These fields allow for a single choice. This means that there is only one ID for the entire field. The syntax is cf_custom_var1234567=ChoiceName, where ChoiceName is the choice that you want to preset.
- Preset values for Checkboxes: Since checkboxes allow for multiple choices, one single ID is not enough. Every option will have its own ID, in order to function like a separate subfield. To precheck an option, use this code: cf_custom_var1234567-0=yes. As you can see, the first option is -0, next one -1, next one -2 and so on.
- Preset values for Likert Scales: Each Likert scales statement has an individual ID. To preset a value for a Likert statement, use the following code: cf_custom_var1234567=Neutral, i.e. the value will be the name of the option that you want to have preset.
- To introduce white spaces in pre-filled form fields, use the code %20. For example, to obtain the preset value Fifth Avenue for a field, you will need the following code: cf_custom_var1234567=Fifth%20Avenue.