When writing an email, there’s a big difference between “Dear client” and “Hello John”. In this tutorial, you will learn how to set up customized notification emails that are triggered after your clients submit data through your form. Let’s set it up for the form of your choosing. First, go to Settings. Scroll down a bit and you will find the Form user options. Click on Send a confirmation message to the sender (autoresponder)
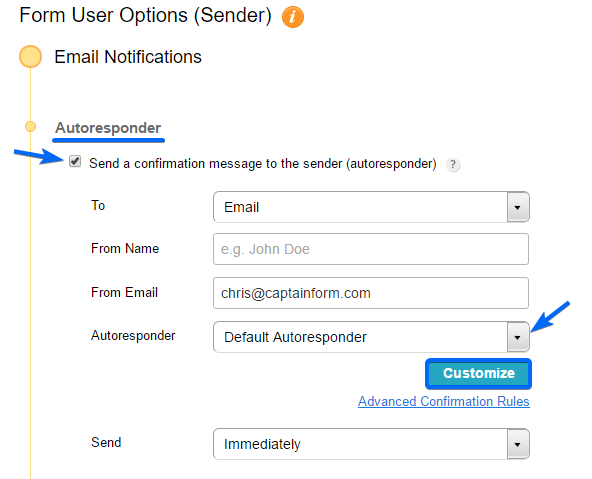 By default, the autoresponder is sent to the first Email field in your form, but you can change it to any valid Email input. You can also change the Email address and Name from where the autoresponder is being sent. Let’s change the default autoresponder by clicking on Customize.
 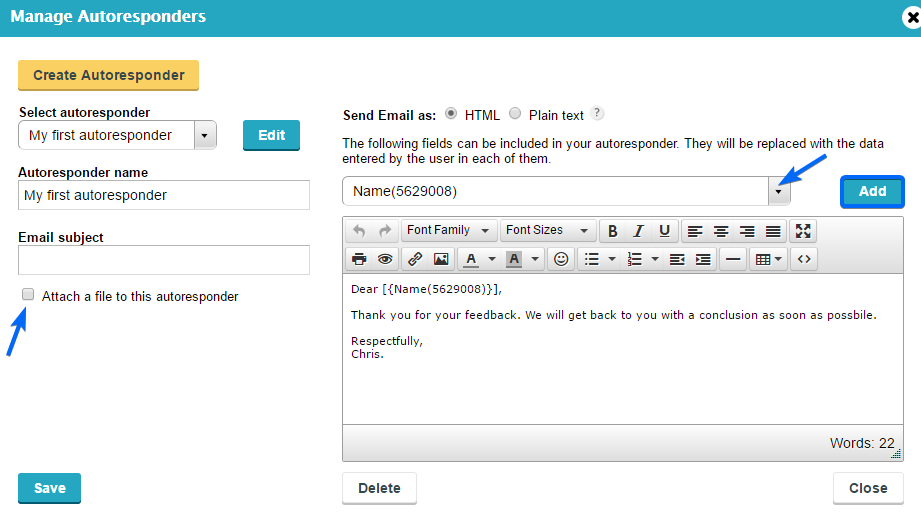 After you click on Create autoresponder, you gain full control over the email content. Here’s what you can do:
- Edit the Autoresponder name for future reference.
- Change the Email subject
- Send the email in HTML format (this is a must for the variables to be properly shown)
- Add field variables in the email content. You’ll just have to select the fields from the dropdown menu and place them below by clicking on “Add”.
Have fun creating personalized emails!